

Vectra AI RUX MCP Server
by vectra-ai-research · Ai-Ml
Vectra AI MCP Server - An MCP server that connects AI assistants & agents to the Vectra AI security platform, enabling intelligent threat analysis and automated incident response.
Vectra AI MCP Server
This project implements an MCP server for the Vectra AI Platform.
What is Vectra AI MCP?
An MCP server that connects AI assistants to your Vectra AI security platform, enabling intelligent analysis of threat detection data, security insights, and automated incident response workflows. Compatible with Claude, ChatGPT, Cursor, VS Code and other MCP-enabled AI tools.
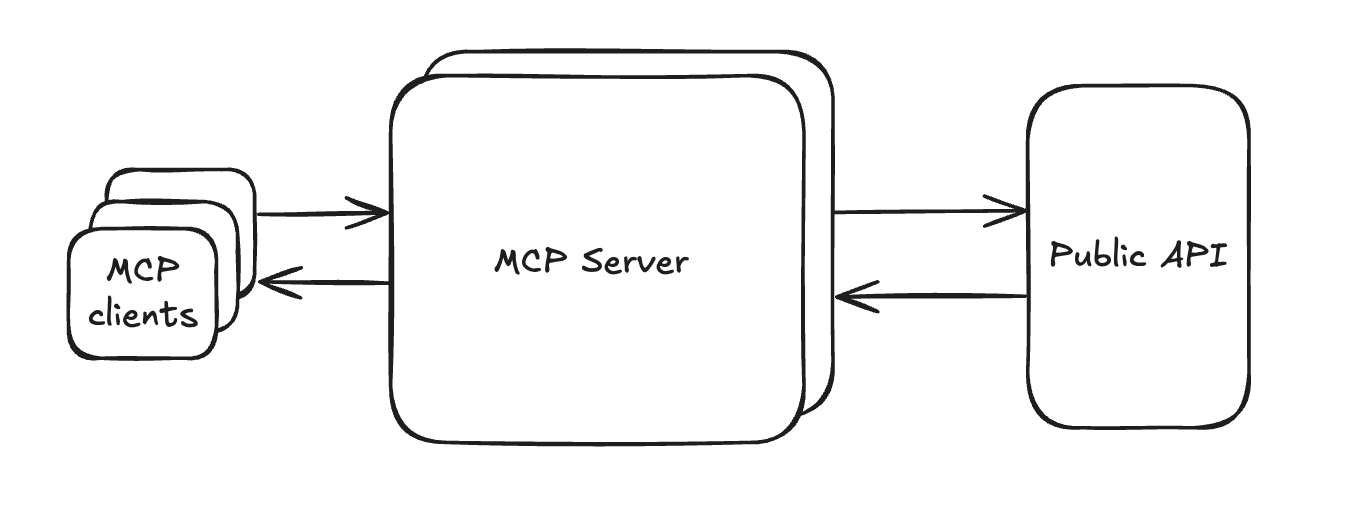
What can you do with Vectra AI MCP?
- Investigate threats in natural language
- Take response actions in Vectra directly from your AI agent
- Correlate and analyze security data using prompts
- Dynamically build advanced visulizations for analysis
- Generate investigation reports from natural language
- Retrieve complete platform health or a specific health category, including EDR, external connector, and Network Brain status
Setup - uvx (Recommended for End Users)
uvx (part of uv) runs the published package in an isolated, ephemeral environment — no clone, no virtualenv, no Docker required. This is the easiest way to use the server when you just want to plug it into Claude Desktop, Cursor, VS Code, or any other MCP client.
Prerequisites
- uv installed: ```bash # macOS / Linux curl -LsSf https://astral.sh/uv/install.sh | sh
# Windows powershell -c "irm https://astral.sh/uv/install.ps1 | iex"
# Or via pip
pip install uv
``
- Python 3.12+ is fetched automatically by
uvx` if it's not on your system.
Quick check
Once uv is installed, verify everything works without installing anything permanently:
# Once published to PyPI:
uvx vectra-ai-mcp-server --help

# Until then (or to track the latest main branch):
uvx --from git+https://github.com/vectra-ai-research/vectra-ai-mcp-server vectra-ai-mcp-server --help
MCP client configuration (single tenant)
Pass credentials via the env block of your MCP client config — uvx does not load .env for you.
{
  "mcpServers": {
    "vectra-ai-mcp": {
      "command": "uvx",
      "args": ["vectra-ai-mcp-server"],
      "env": {
        "VECTRA_BASE_URL": "https://123456789.ab1.portal.vectra.ai",
        "VECTRA_CLIENT_ID": "<your-client-id>",
        "VECTRA_CLIENT_SECRET": "<your-client-secret>"
      }
    }
  }
}
Pin a specific version with uvx [email protected] (recommended for production setups).
MCP client configuration (multi-tenant)
Provide an absolute path to a tenants.yaml file you've placed somewhere on disk (e.g. ~/.config/vectra/tenants.yaml):
{
  "mcpServers": {
    "vectra-ai-mcp": {
      "command": "uvx",
      "args": [
        "vectra-ai-mcp-server",
        "--config",
        "/absolute/path/to/tenants.yaml"
      ],
      "env": {
        "VECTRA_TENANT_PROD_CLIENT_SECRET": "...",
        "VECTRA_TENANT_STAGING_CLIENT_SECRET": "..."
      }
    }
  }
}
See tenants.yaml.example for the file format. Per-tenant secrets can be injected via VECTRA_TENANT_<NAME>_<FIELD> env vars instead of being written into the YAML file.
Running directly from a Git ref
Useful for testing branches or unreleased fixes:
uvx --from git+https://github.com/vectra-ai-research/vectra-ai-mcp-server@main vectra-ai-mcp-server
The same --from git+... form works inside an MCP client args list.
Setup - Host Locally (For Development)
Use this path if you're hacking on the server itself. End users should prefer the uvx setup above.
Prerequisites
-
Install Python Check .python-version file for the required version
-
Install uv - Python package manager
# On macOS/Linux
curl -LsSf https://astral.sh/uv/install.sh | sh

# On Windows
powershell -c "irm https://astral.sh/uv/install.ps1 | iex"

# Or via pip
pip install uv
Setup Steps
- Clone/Download the project to your local machine
- Navigate to the project directory:
cd your-project-directory
- Configure credentials:
Option A: Single Tenant (.env file)
# Copy the example environment file
cp .env.example .env
Then edit the .env file with your actual Vectra AI Platform credentials.
Required variables to update:
VECTRA_BASE_URL: Your Vectra portal URLVECTRA_CLIENT_ID: Your client ID from VectraVECTRA_CLIENT_SECRET: Your client secret from Vectra
Option B: Multiple Tenants (YAML config)
If you have multiple Vectra tenants, use a YAML configuration file instead:
cp tenants.yaml.example tenants.yaml
Then edit tenants.yaml with your tenant details:
tenants:
  - name: prod
    base_url: https://prod-tenant.uw2.portal.vectra.ai
    client_id: "<prod-client-id>"
    client_secret: "<prod-client-secret>"

  - name: staging
    base_url: https://staging-tenant.uw2.portal.vectra.ai
    client_id: "<staging-client-id>"
    client_secret: "<staging-client-secret>"
Each tenant gets its own set of tools prefixed with the tenant name (e.g., prod_list_detections, staging_list_detections). A list_tenants meta-tool is also added to discover available tenants.
Per-tenant values can be overridden via environment variables using the pattern VECTRA_TENANT_<NAME>_<FIELD> (e.g., VECTRA_TENANT_PROD_CLIENT_SECRET). This is useful for Docker/Kubernetes where secrets should not be stored in files.
- Create and activate a virtual environment:
uv venv

# Activate it:
# On macOS/Linux:
source .venv/bin/activate

# On Windows:
.venv\Scripts\activate
- Install dependencies:
uv sync
This installs all dependencies from uv.lock and installs the package itself in editable mode, exposing the vectra-ai-mcp-server console script inside the venv.
- Run the application:
The server supports multiple transport protocols:
# Run with stdio transport (default, for Claude Desktop)
uv run vectra-ai-mcp-server
uv run vectra-ai-mcp-server --transport stdio

# Run with SSE transport (for HTTP-based MCP clients)
uv run vectra-ai-mcp-server --transport sse --host 0.0.0.0 --port 8000

# Run with streamable-http transport (for production HTTP deployments)
uv run vectra-ai-mcp-server --transport streamable-http --host 0.0.0.0 --port 8000

# Run with multi-tenant YAML config
uv run vectra-ai-mcp-server --config tenants.yaml
uv run vectra-ai-mcp-server -c tenants.yaml --transport sse

# Enable debug logging
uv run vectra-ai-mcp-server --debug

# Equivalent module form (also works after `uv sync`):
uv run python -m vectra_mcp_server
Transport Options: - stdio: Standard input/output communication (default, used by Claude Desktop) - sse: Server-Sent Events over HTTP (good for web-based clients) - streamable-http: Streamable HTTP transport (recommended for production HTTP deployments)
Environment Variables: You can also configure the server using environment variables:
export VECTRA_MCP_TRANSPORT=streamable-http
export VECTRA_MCP_HOST=0.0.0.0
export VECTRA_MCP_PORT=8000
export VECTRA_MCP_DEBUG=true
uv run vectra-ai-mcp-server
MCP Configuration for Claude Desktop
- Add MCP Server to Claude Desktop:
# On macOS:
# Open Claude Desktop configuration file
code ~/Library/Application\ Support/Claude/claude_desktop_config.json

# On Windows:
# Open Claude Desktop configuration file
notepad %APPDATA%/Claude/claude_desktop_config.json
Add the following configuration to the mcpServers section (update the paths to match your setup):
Tip: For end-user setups (no source checkout), prefer the
uvxconfiguration at the top of this README. The configs below are for running directly from a local source checkout — useful while you're developing the server.
Single Tenant:
{
  "mcpServers": {
    "vectra-ai-mcp": {
      "command": "/path/to/your/uv/binary",
      "args": [
        "--directory",
        "/path/to/your/project/directory",
        "run",
        "vectra-ai-mcp-server"
      ]
    }
  }
}
Multi-Tenant:
{
  "mcpServers": {
    "vectra-ai-mcp": {
      "command": "/path/to/your/uv/binary",
      "args": [
        "--directory",
        "/path/to/your/project/directory",
        "run",
        "vectra-ai-mcp-server",
        "--config",
        "tenants.yaml"
      ]
    }
  }
}
- Debug - Find your uv installation path:
# Find where uv is installed
which uv
# or
where uv
- Debug - Get your project's absolute path:
# From your project directory, run:
pwd
- Restart Claude Desktop to load the new MCP server configuration.
Other MCP Client Setup
Once configured, you should be able to use Vectra AI Platform capabilities directly within Claude Desktop or other MCP clients through this MCP server!
For other MCP clients besides Claude Desktop, refer to the documentation links below:
| MCP Client | Documentation Link |
|---|---|
| General MCP Setup | https://modelcontextprotocol.io/quickstart/user |
| Cursor | https://docs.cursor.com/en/context/mcp#using-mcp-json |
| VS Code | https://code.visualstudio.com/docs/copilot/chat/mcp-servers#_add-an-mcp-server |
For other MCP clients, refer to their respective documentation. The general pattern is similar - you'll need to specify the command and arguments to run the MCP server with the same configuration structure.
Setup - Docker Deployment
For production deployments or easier setup, you can run the Vectra AI MCP Server using Docker. We provide two options:
Option 1: Using Pre-built Images (Recommended)
The easiest way to get started is using our pre-built Docker images from GitHub Container Registry.
Prerequisites
- Docker Desktop or Docker Engine
Quick Start Steps
- Configure environment variables:
# Copy the example environment file
cp .env.example .env
Then edit the .env file with your actual Vectra AI Platform credentials.
- Choose a tag.
| Tag | Moves when | Use for |
|---|---|---|
:0.3.2 |
never | production — pin to an exact release |
:0.3 |
a new 0.3.x release | production, floating within a minor line |
:latest |
a new release is tagged | evaluation, or when you want the newest release |
:main |
every push to main |
tracking unreleased work; expect breakage |
Examples below use :latest. For production, replace it with an exact
version. :latest tracked the main branch until 0.4.0, so any merge landed
in deployments on the next pull; it now moves only on a tagged release, but a
pinned tag is still the only one that never changes under you.
- Run with pre-built image:
Streamable HTTP Transport (Recommended for Production)
docker run -d \
  --name vectra-mcp-server-http \
  --env-file .env \
  -e VECTRA_MCP_TRANSPORT=streamable-http \
  -e VECTRA_MCP_HOST=0.0.0.0 \
  -e VECTRA_MCP_PORT=8000 \
  -p 8000:8000 \
  --restart unless-stopped \
  ghcr.io/vectra-ai-research/vectra-ai-mcp-server:latest
SSE Transport (Server-Sent Events)
docker run -d \
  --name vectra-mcp-server-sse \
  --env-file .env \
  -e VECTRA_MCP_TRANSPORT=sse \
  -e VECTRA_MCP_HOST=0.0.0.0 \
  -e VECTRA_MCP_PORT=8000 \
  -p 8000:8000 \
  --restart unless-stopped \
  ghcr.io/vectra-ai-research/vectra-ai-mcp-server:latest
Stdio Transport (For Local MCP Clients)
docker run -d \
  --name vectra-mcp-server-stdio \
  --env-file .env \
  -e VECTRA_MCP_TRANSPORT=stdio \
  --restart unless-stopped \
  ghcr.io/vectra-ai-research/vectra-ai-mcp-server:latest
- Or use Docker Compose (Alternative):
Create a docker-compose.yml file:
version: '3.8'
services:
  vectra-mcp-server:
    image: ghcr.io/vectra-ai-research/vectra-ai-mcp-server:latest
    container_name: vectra-mcp-server
    env_file: .env
    environment:
      - VECTRA_MCP_TRANSPORT=streamable-http
      - VECTRA_MCP_HOST=0.0.0.0
      - VECTRA_MCP_PORT=8000
    ports:
      - "8000:8000"
    restart: unless-stopped
Then run:
docker-compose up -d
Available Tags:
- latest: Latest stable build from main branch
- main: Latest build from main branch (same as latest)
- v*: Specific version tags (e.g., v1.0.0)
💡 Tip: Pre-built images are automatically built and published via GitHub Actions whenever code is pushed to the main branch or when releases are tagged. This ensures you always get the latest tested version without needing to build locally.
Option 2: Build from Source
For development or customization, you can build the Docker image from source.
Prerequisites
- Install Docker and Docker Compose
- Docker Desktop (includes Docker Compose)
- Or install Docker Engine and Docker Compose separately on Linux
Build from Source Steps
- Clone/Download the project to your local machine
- Navigate to the project directory:
cd your-project-directory
- Configure environment variables:
# Copy the example environment file
cp .env.example .env
Then edit the .env file with your actual Vectra AI Platform credentials.
- Build and run with Docker:
# Build the image
docker build -t vectra-mcp-server .
- Run the locally built image:
Choose your transport mode and run with the locally built image:
Streamable HTTP Transport
docker run -d \
  --name vectra-mcp-server-http \
  --env-file .env \
  -e VECTRA_MCP_TRANSPORT=streamable-http \
  -e VECTRA_MCP_HOST=0.0.0.0 \
  -e VECTRA_MCP_PORT=8000 \
  -p 8000:8000 \
  --restart unless-stopped \
  vectra-mcp-server
SSE Transport
docker run -d \
  --name vectra-mcp-server-sse \
  --env-file .env \
  -e VECTRA_MCP_TRANSPORT=sse \
  -e VECTRA_MCP_HOST=0.0.0.0 \
  -e VECTRA_MCP_PORT=8000 \
  -p 8000:8000 \
  --restart unless-stopped \
  vectra-mcp-server
Stdio Transport
docker run -d \
  --name vectra-mcp-server-stdio \
  --env-file .env \
  -e VECTRA_MCP_TRANSPORT=stdio \
  --restart unless-stopped \
  vectra-mcp-server
Docker Multi-Tenant Setup
To run the server in multi-tenant mode with Docker:
- Create a
tenants.yamlfile (seetenants.yaml.example). - Mount it into the container and set
VECTRA_CONFIG_FILE:
docker run -d \
  --name vectra-mcp-server \
  -e VECTRA_CONFIG_FILE=/app/tenants.yaml \
  -e VECTRA_MCP_TRANSPORT=streamable-http \
  -e VECTRA_MCP_HOST=0.0.0.0 \
  -e VECTRA_MCP_PORT=8000 \
  -v ./tenants.yaml:/app/tenants.yaml:ro \
  -p 8000:8000 \
  --restart unless-stopped \
  ghcr.io/vectra-ai-research/vectra-ai-mcp-server:latest
You can inject secrets per-tenant via environment variables instead of storing them in the YAML file:
docker run -d \
  --name vectra-mcp-server \
  -e VECTRA_CONFIG_FILE=/app/tenants.yaml \
  -e VECTRA_TENANT_PROD_CLIENT_SECRET=<secret> \
  -e VECTRA_TENANT_STAGING_CLIENT_SECRET=<secret> \
  -v ./tenants.yaml:/app/tenants.yaml:ro \
  -p 8000:8000 \
  ghcr.io/vectra-ai-research/vectra-ai-mcp-server:latest
Docker Environment Variables
The Docker container supports all the same environment variables as the local setup, plus additional MCP server configuration:
MCP Server Configuration
VECTRA_MCP_TRANSPORT: Transport protocol (stdio,sse, orstreamable-http) - default:stdioVECTRA_MCP_HOST: Host to bind to for HTTP transports - default:0.0.0.0VECTRA_MCP_PORT: Port for HTTP transports - default:8000VECTRA_MCP_DEBUG: Enable debug logging - default:falseVECTRA_CONFIG_FILE: Path to YAML config file for multi-tenant mode (optional)
Multi-Tenant Override Variables
When using a YAML config file, per-tenant settings can be overridden via environment variables:
- VECTRA_TENANT_<NAME>_BASE_URL
- VECTRA_TENANT_<NAME>_CLIENT_ID
- VECTRA_TENANT_<NAME>_CLIENT_SECRET
- VECTRA_TENANT_<NAME>_API_VERSION
- VECTRA_TENANT_<NAME>_REQUEST_TIMEOUT
Where <NAME> is the tenant name in uppercase (e.g., VECTRA_TENANT_PROD_CLIENT_SECRET).
Accessing the HTTP Server
When running with HTTP transports (sse or streamable-http), the MCP server will be available at:
- Streamable HTTP: http://localhost:8000/mcp
- SSE: http://localhost:8000/sse
MCP Client Configuration for Docker
For HTTP-based MCP clients connecting to the Dockerized server, use the appropriate endpoint:
{
  "mcpServers": {
    "vectra-ai-mcp": {
      "transport": {
        "type": "http",
        "url": "http://localhost:8000/"
      }
    }
  }
}
Docker Health Checks
The Docker container includes health checks that will verify the server is running properly:
- For stdio transport: Always reports healthy (no HTTP endpoint to check)
- For HTTP transports: Checks HTTP endpoint availability
Note: MCP (Model Context Protocol) is an emerging and rapidly evolving technology. Exercise caution when using this server and follow security best practices, including proper credential management and network security measures.
Parameters
detection_id
ID of the detection to retrieve details for (minimum: 1)
Parameters
ordering
Order by last_timestamp, created_datetime, or id. Defaults to ordering by last_timestamp
detection_category
Filter by detection category (command, botnet, lateral, reconnaissance, exfiltration, info)
detection_name
Filter by detection name (supports partial word match)
state
Filter by detection state (active, inactive, fixed, filteredbyai, filteredbyrule)
src_ip
Filter by source IP address of the host that generated the detection
start_date
Filter by start date (YYYY-MM-DDTHH:MM:SS)
end_date
Filter by end date (YYYY-MM-DDTHH:MM:SS)
is_targeting_key_asset
Filter for detections targeting a key asset
limit
Maximum number of detections to return (1-1000, default: 1000)
Parameters
start_date
Filter by start date (YYYY-MM-DDTHH:MM:SS)
end_date
Filter by end date (YYYY-MM-DDTHH:MM:SS)
detection_category
Filter by detection category
state
Filter by detection state (active, inactive, fixed, filteredbyai, filteredbyrule)
detection_name
Filter by detection name (supports partial word match)
src_ip
Filter by source IP address of the host that generated the detection
is_targeting_key_asset
Filter for detections targeting a key asset
Parameters
detection_id
ID of the detection to retrieve pcap for (minimum: 1)
Parameters
entity_id
ID of the entity to list detections for (minimum: 1)
state
Filter by detection state (active, inactive, fixed, filteredbyai, filteredbyrule)
Parameters
state
Filter by detection state (active, inactive, fixed, filteredbyai, filteredbyrule)
ordering
Order by last_timestamp, created_datetime, or id
detection_category
Filter by detection category (command, botnet, lateral, reconnaissance, exfiltration, info)
detection_name
Filter by detection name (supports partial word match)
src_ip
Filter by source IP address of the host that generated the detection
start_date
Filter by start date (YYYY-MM-DDTHH:MM:SS)
end_date
Filter by end date (YYYY-MM-DDTHH:MM:SS)
is_targeting_key_asset
Filter for detections targeting a key asset
limit
Maximum number of detections to return (1-1000)
Parameters
detection_id
ID of the detection to retrieve summary for (minimum: 1)
Parameters
ordering
Order by last_timestamp, created_datetime, or id
state
Filter by detection state (active, inactive, fixed, filteredbyai, filteredbyrule)
detection_category
Filter by detection category (command, botnet, lateral, reconnaissance, exfiltration, info)
detection_name
Filter by detection name (supports partial word match)
src_ip
Filter by source IP address of the host that generated the detection
start_date
Filter by start date (YYYY-MM-DDTHH:MM:SS)
end_date
Filter by end date (YYYY-MM-DDTHH:MM:SS)
is_targeting_key_asset
Filter for detections targeting a key asset
limit
Maximum number of detections to return (1-1000, default: 1000)
Parameters
entity_type
Select type of entity to retrieve (account or host)
state
Filter by entity state (active, inactive)
ordering
Order by urgency_score, last_detection_timestamp, last_modified_timestamp, or name (prefix with - for descending)
name
Filter by entity name (supports partial word match)
host_ip
Filter by entity IP address (only applicable for host entities)
is_prioritized
Filter for prioritized entities or non-prioritized entities
tags
Filter for entities with a particular tag
limit
Maximum number of entities to return (1-1000, default: 1000)
Parameters
account_id
ID of the account in Vectra platform to retrieve details for (minimum: 1)
fields
Fields to return in the results (optional)
exclude_fields
Fields to exclude in the response object (optional)
include_access_history
Include account access history in the response
include_detection_summaries
Include detection summaries in the response
include_external
Include external data in the response
src_linked_account
Source linked account filter
Parameters
entity_name
Name or partial name of the entity to look up (no spaces allowed)
Parameters
host_id
ID of the host entity to retrieve details for (minimum: 1)
Parameters
host_ip
IP address of the host to look up (must be valid IPv4 or IPv6)
Parameters
resolved
Filter assignments by resolved state (True for resolved, False for unresolved)
created_after
List assignments created at or after this timestamp (YYYY-MM-DDTHH:MM:SS)
Parameters
user_id
Vectra platform user ID to retrieve assignments for
resolved
Filter assignments by resolved state (True for resolved, False for unresolved)
Parameters
assignment_id
ID of the assignment to retrieve (minimum: 1)
Parameters
entity_ids
List of entity IDs to retrieve assignment for
entity_type
Type of entity to retrieve assignment for (host or account)
Parameters
assign_to_user_id
ID of the user to assign the entity to (minimum: 1)
assign_entity_id
ID of the entity (account or host) to assign
assign_entity_type
Type of the entity (account or host) to assign
Parameters
entity_id
ID of the entity to add note to (minimum: 1)
entity_type
Type of entity to add note to (host or account)
note
Note text to add to the entity
Parameters
detection_ids
List of detection IDs to mark as fixed or not fixed
mark_fixed
True to mark as fixed, False to unmark as fixed
Parameters
assignment_id
ID of the assignment to delete (minimum: 1)
Parameters
role
Filter by user role (admins, auditor, global_analyst, read_only, restricted_admins, security_analyst, setting_admins, super_admins)
last_login_after
Filter by last login date in ISO format (YYYY-MM-DDTHH:MM:SS)
email
Valid email address of the Vectra platform user to filter by
limit
Maximum number of users to return (1-1000, default: 1000)
Parameters
detection_id
ID of the detection to summarize (1-999999)
Parameters
entity_id
ID of the entity to visualize detections for (1-999999)
graph_theme
Theme for the graph visualization (light or dark, default: dark)
Security Audit
This integration has not been scanned yet. Once a security audit has been completed, the results will be displayed here.
Sign in to leave a review
No reviews yet — be the first!
Configuration
VECTRA_CLIENT_SECRET
required
secret
Configure the connection to Vectra AI RUX MCP Server
VECTRA_BASE_URL
string
The base URL of the Vectra AI RUX MCP Server
VECTRA_CLIENT_ID
string
123456789
Docker Image
Docker HubDocker MCP Toolkit
docker mcp server enable vectra-ai-rux-mcp-server
Or download vectra-ai-rux-mcp-server.yaml
and run docker mcp catalog add my-catalog vectra-ai-rux-mcp-server vectra-ai-rux-mcp-server.yaml
Links
Published by github.com/vectra-ai-research


